Tutorials #
Following the tutorials on this page will take you on a guided tour of various aspects of the SDK. The aim is to show you all of the different pieces, giving you jumping off points (in the form of links) to explore further when you need more information.
Setting up the SDK #
To set up the SDK, follow these steps:
- Make sure you have Unity 2021.3 LTS installed.
- Create a new Unity project for your mod and open it.
- Open the Unity package manager at
Window > Package Manager. - Add the LSD:R SDK package from the following Git URL:
https://github.com/figglewatts/LSDRevamped.git?path=/LSDR/Packages/com.figglewatts.lsdr.sdk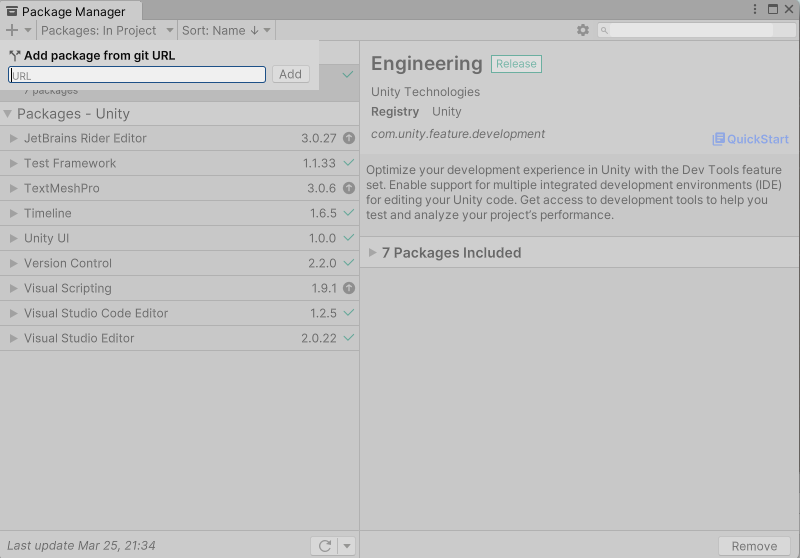
- Wait for the package to install, then you should have an ‘LSDR SDK’ button in the menu bar.
Creating a new mod #
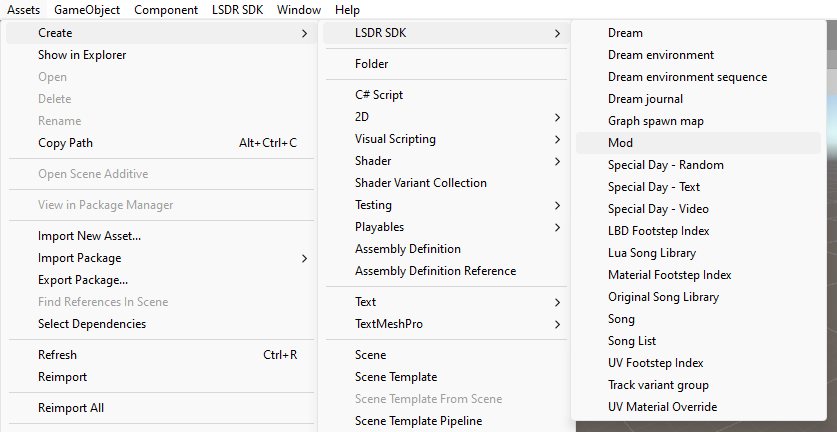
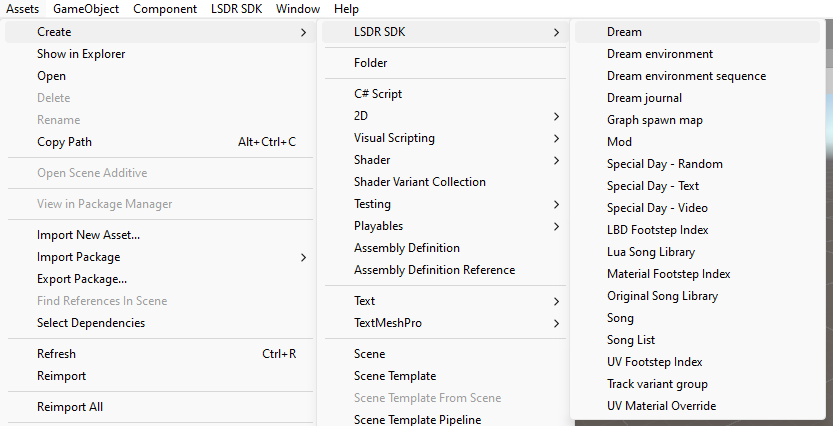
You can create a mod from the Assets > Create > LSDR SDK > Mod menu:
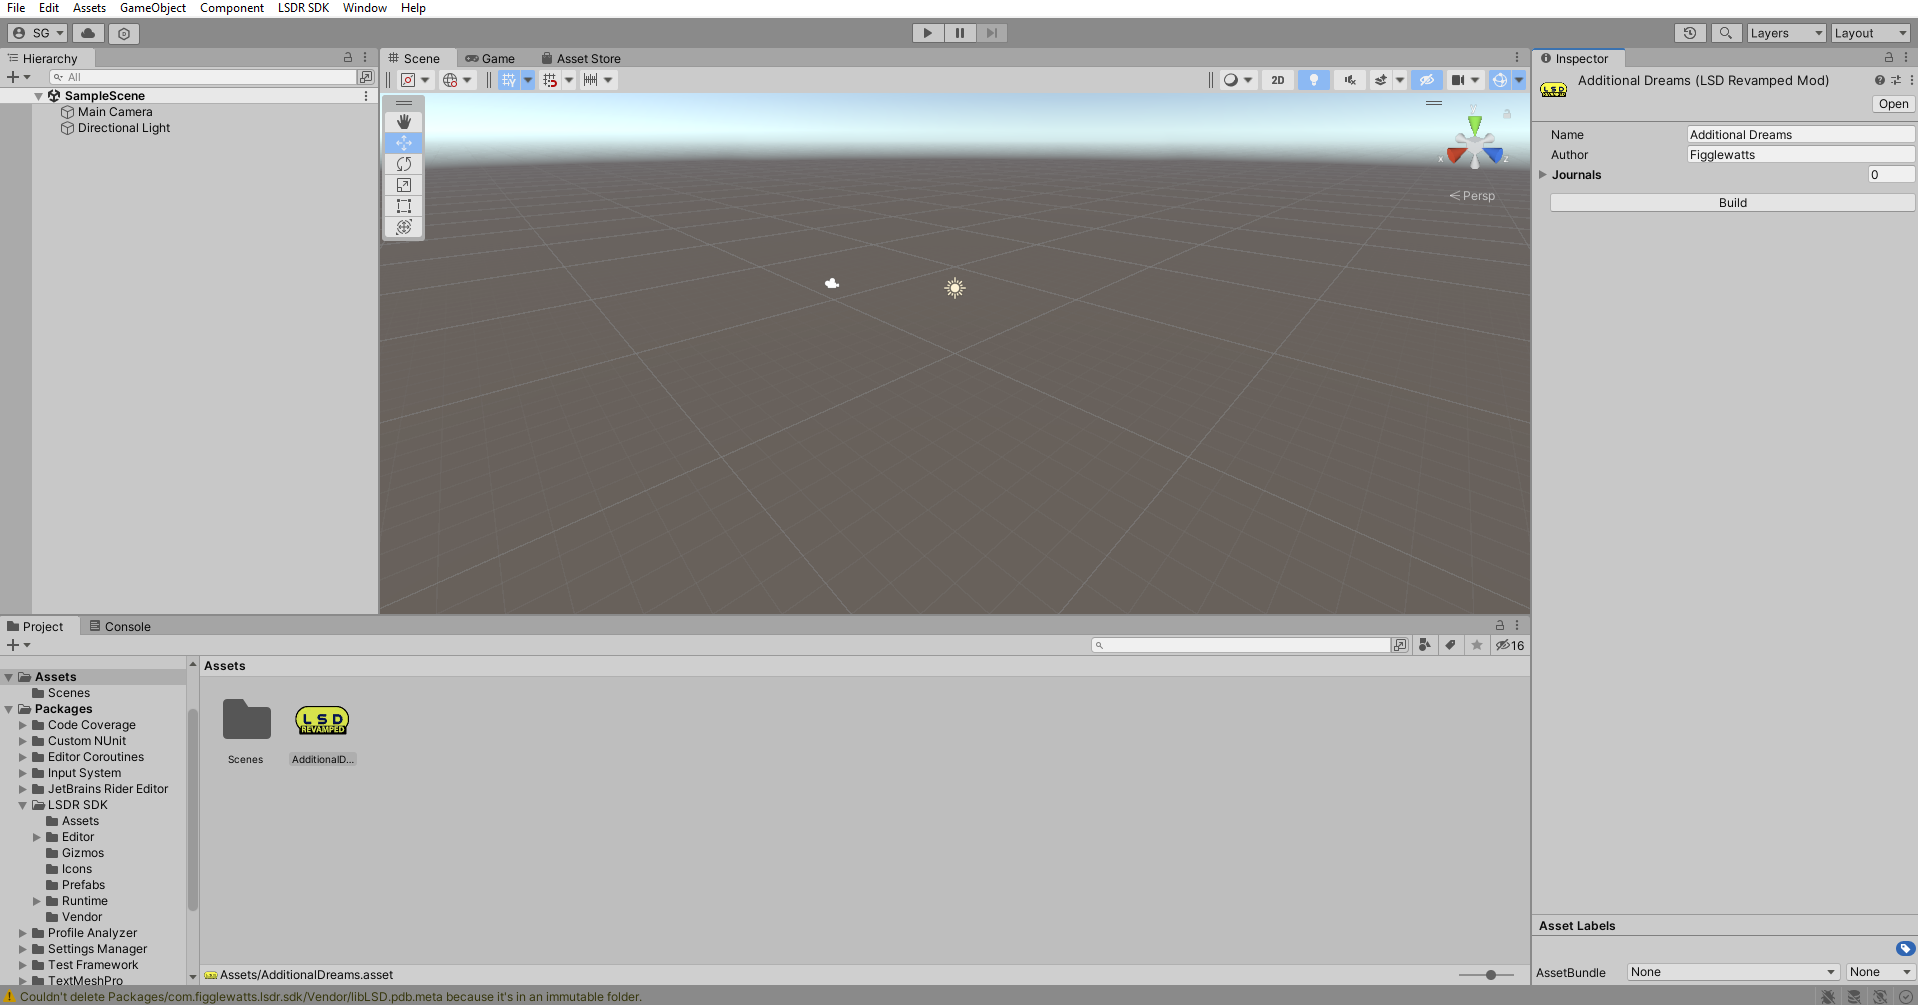
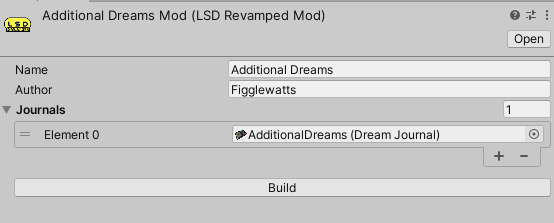
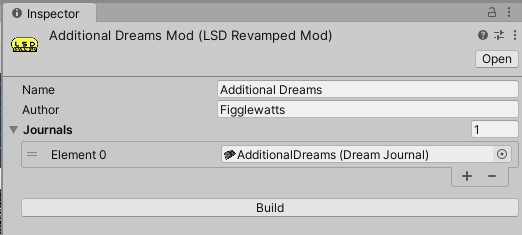
When created, you can edit the mod’s properties by finding it in the Project view, clicking on it, and editing it in the Inspector.
The mod contains the data for your mod to be loaded in LSD: Revamped. Pressing the ‘Build’ button will build your mod, once you’ve added some content later on.
Creating a dream journal #
The next step to making a mod is creating a dream journal. Your mod can have multiple dream journals, but only one can be active at once. You can switch between mods and journals from the title screen of LSD: Revamped, by going to the gameplay settings.
A dream journal is a collection of dreams with some additional data. In LSD:R you ‘play’ a dream journal - the game loads all of the dreams and data for the player to experience from the journal.
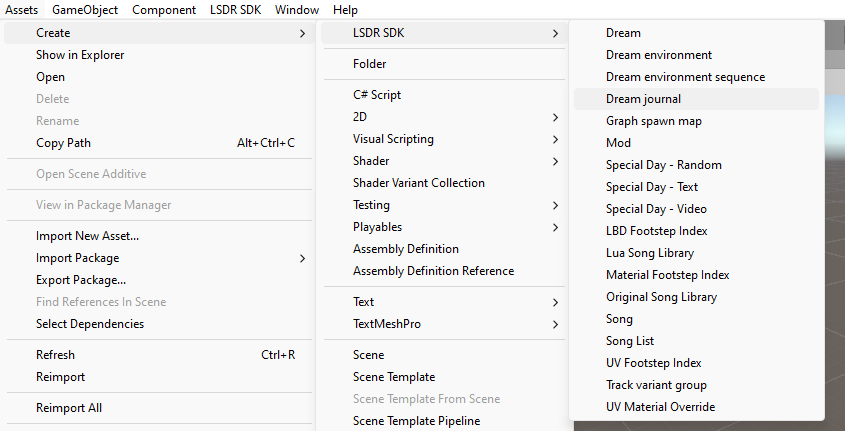
You can create a dream journal from the Assets > Create > LSDR SDK > Dream journal menu.
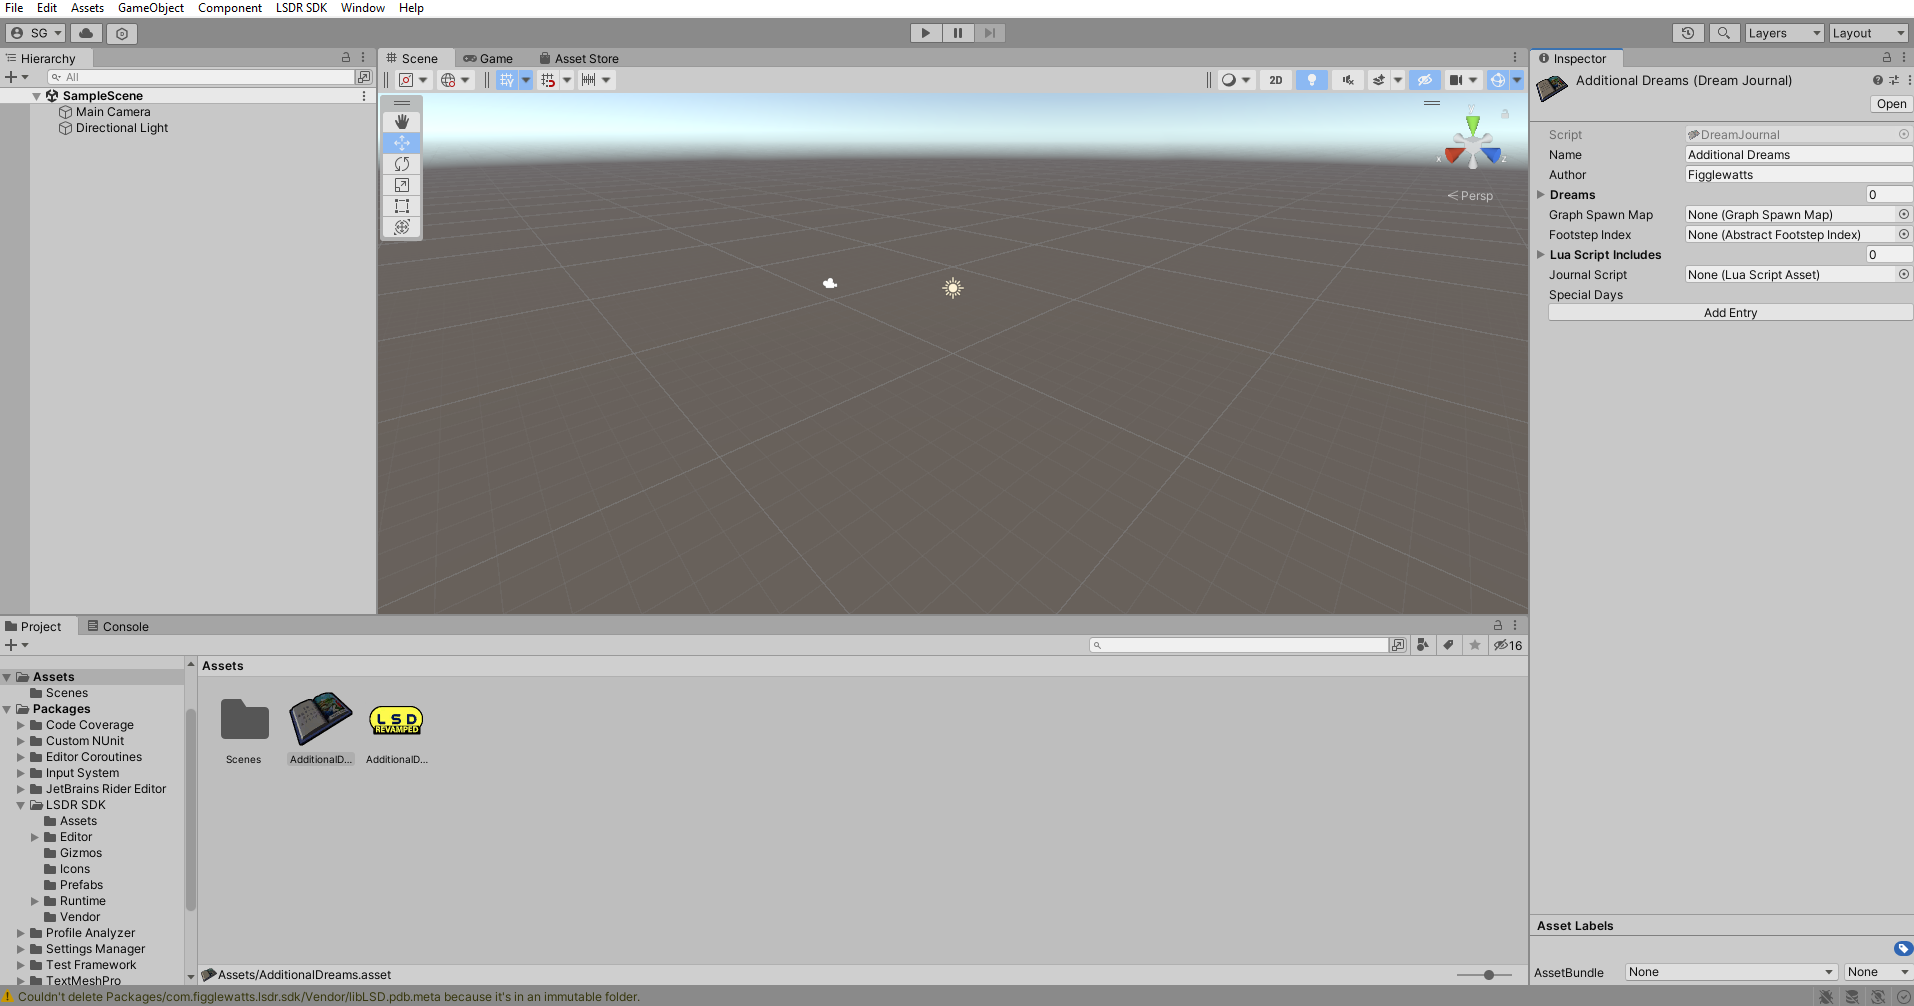
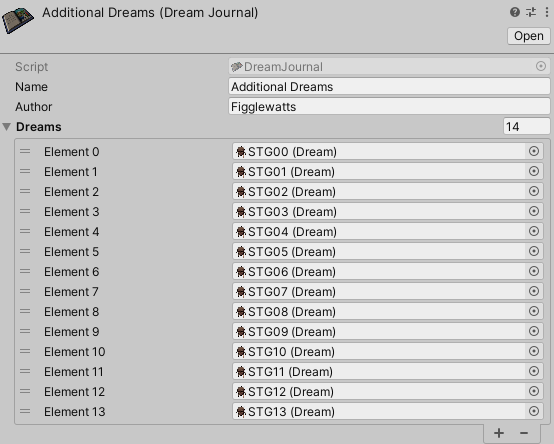
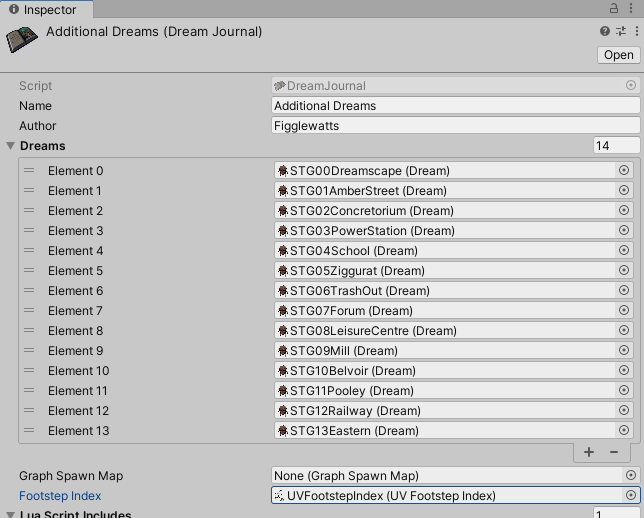
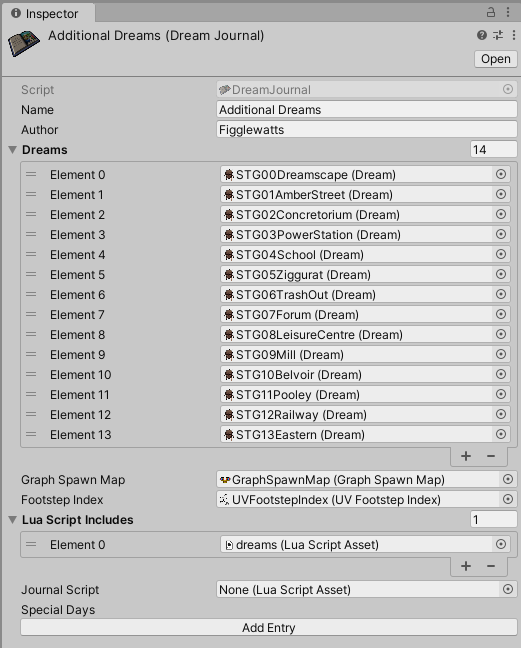
The dream journal has the list of dreams in the journal, as well as lots of other data the game will use. Be sure to give it a Name!
Make sure you add the journal to your mod’s list of journals.
Next up, we will create our first dream.
Creating a dream #
A dream is a level the player can explore. It has a bunch of data about the level, and a path to a Unity Prefab containing the level.
You can create a dream from the Assets > Create > LSDR SDK > Dream menu.
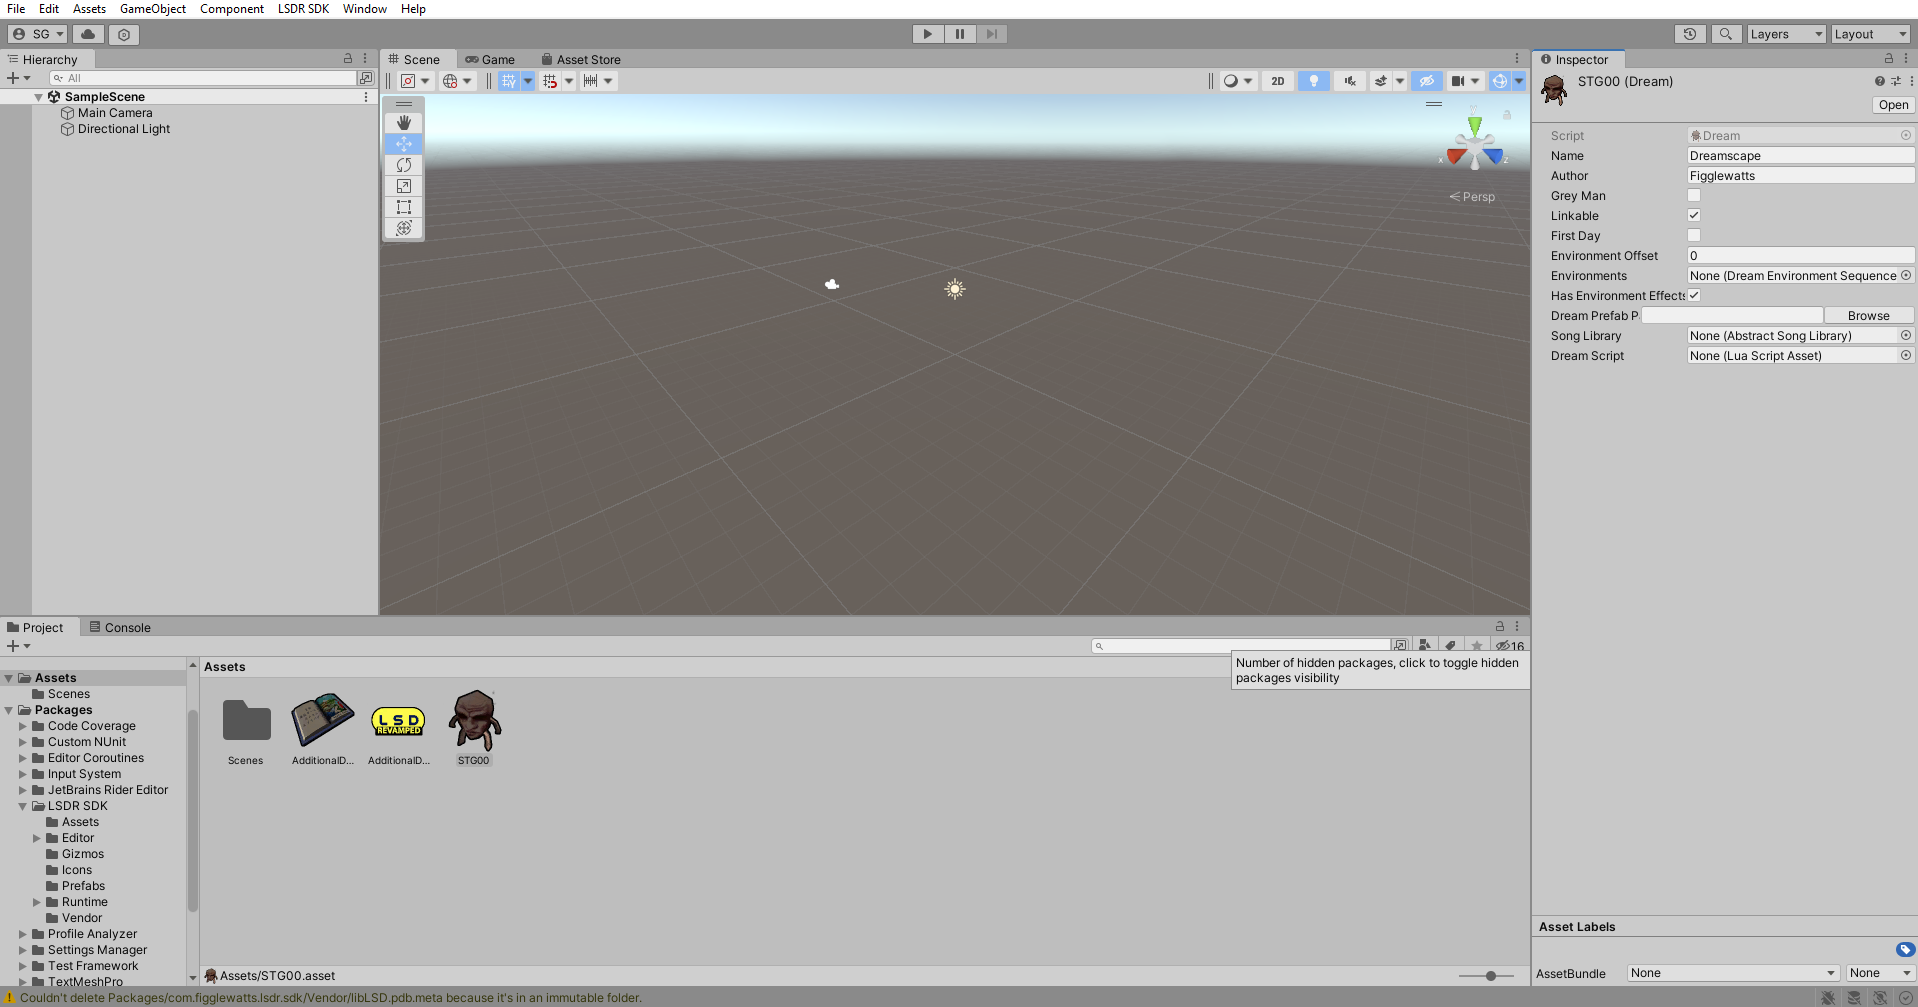
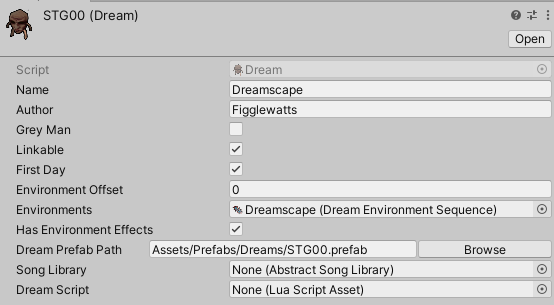
As always, you can edit the properties of the dream in the Inspector. Be sure to give it a name!
When you make a new dream, be sure to add it to your dream journal’s list of dreams.
The dream scene #
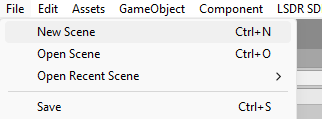
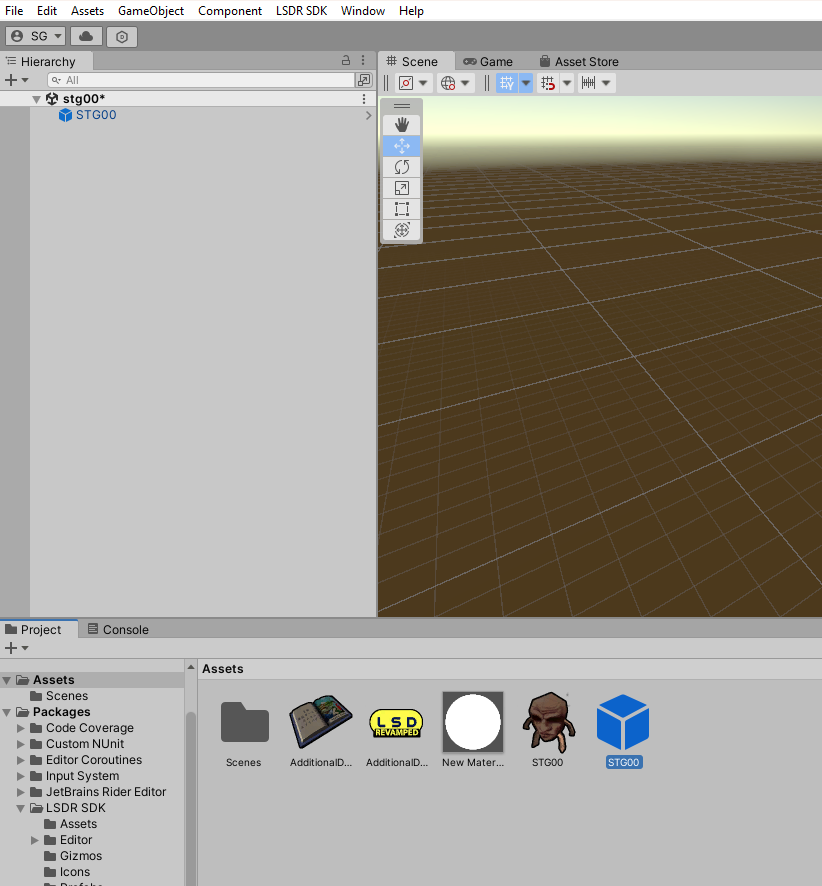
Now, we’ll create a Unity scene for our dream. You can do this from the File > New Scene menu.
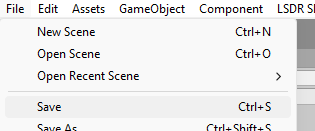
Now the scene is created, let’s save it!
Next up we’ll create a prefab for our dream scene and associate it with the dream asset.
The dream prefab #
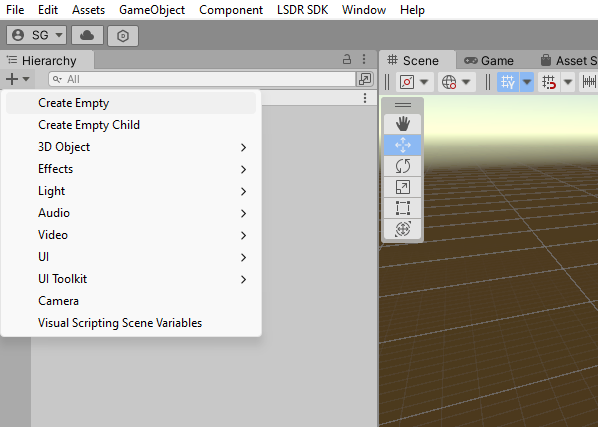
Let’s create an empty GameObject in our scene:
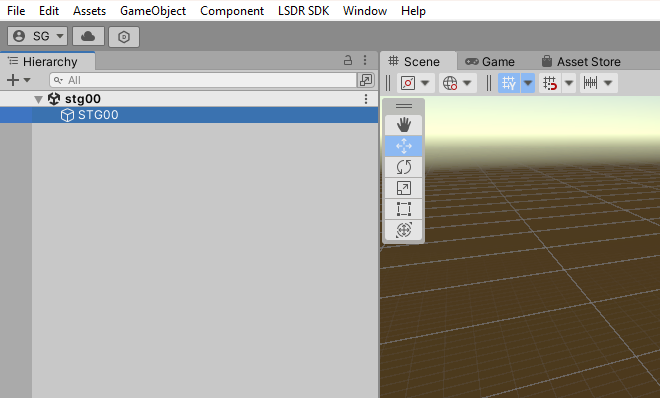
Now drag the GameObject down from the Hierarchy into a folder in the Project view. This will create a prefab of that GameObject.
You should now have the GameObject in your project view. Save the scene to make sure your progress is kept!
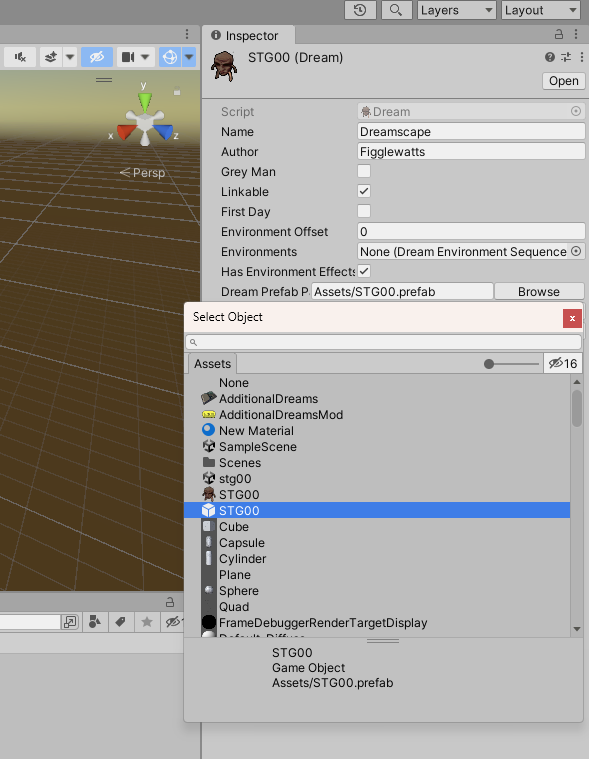
Now, go to the dream asset for the dream you’re making, and press the ‘Browse’ button for the Dream Prefab Path. Choose the prefab you just made.
Your dream is now set up! You will need to repeat this process for every dream in the dream journal.
LSD:R will instantiate the prefab object when loading your dream, so be sure to keep everything in your dream within the prefab. Usually the workflow I use is to keep a Unity scene for each dream prefab, and I do all of my edits to the levels within the prefab object.
Setting up the dream’s environment #
A dream’s dream environment controls the sky and fog of the scene, as well as whether or not effects like the sun, clouds, and stars are visible.
A dream has a reference to a list of dream environments called a dream environment sequence. The dream environment is selected from this sequence based on the current day number plus the dream’s environment offset.
It can be convenient to share a common list of dream environments between dreams, so you can only define it once and use it in many places. You should give each dream a different environment offset so that there is still local variation between environments in a given day.
Let’s make a dream environment sequence with a dream environment, and tell our dream to use it.
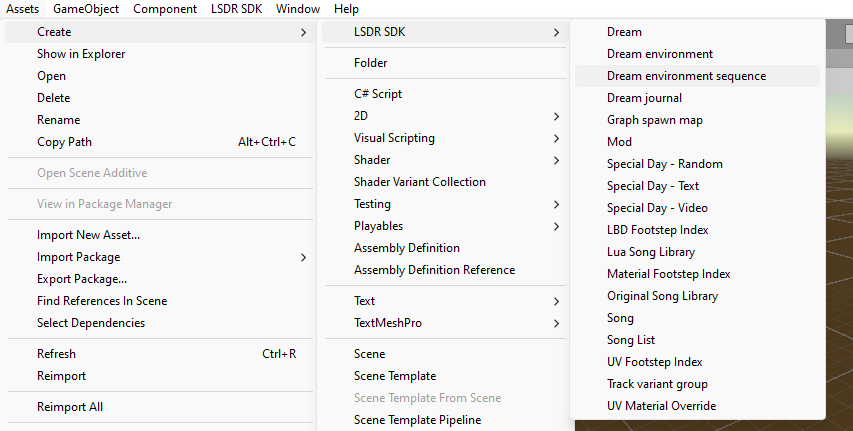
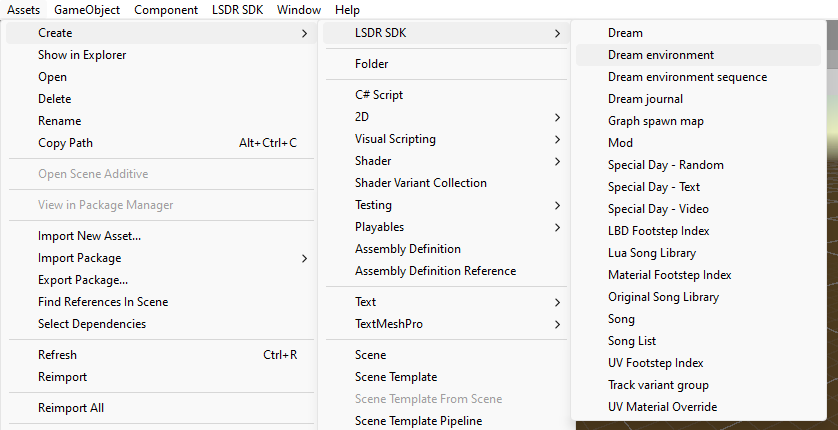
You can create one by using the Assets > Create > LSDR SDK > Dream environment sequence menu.
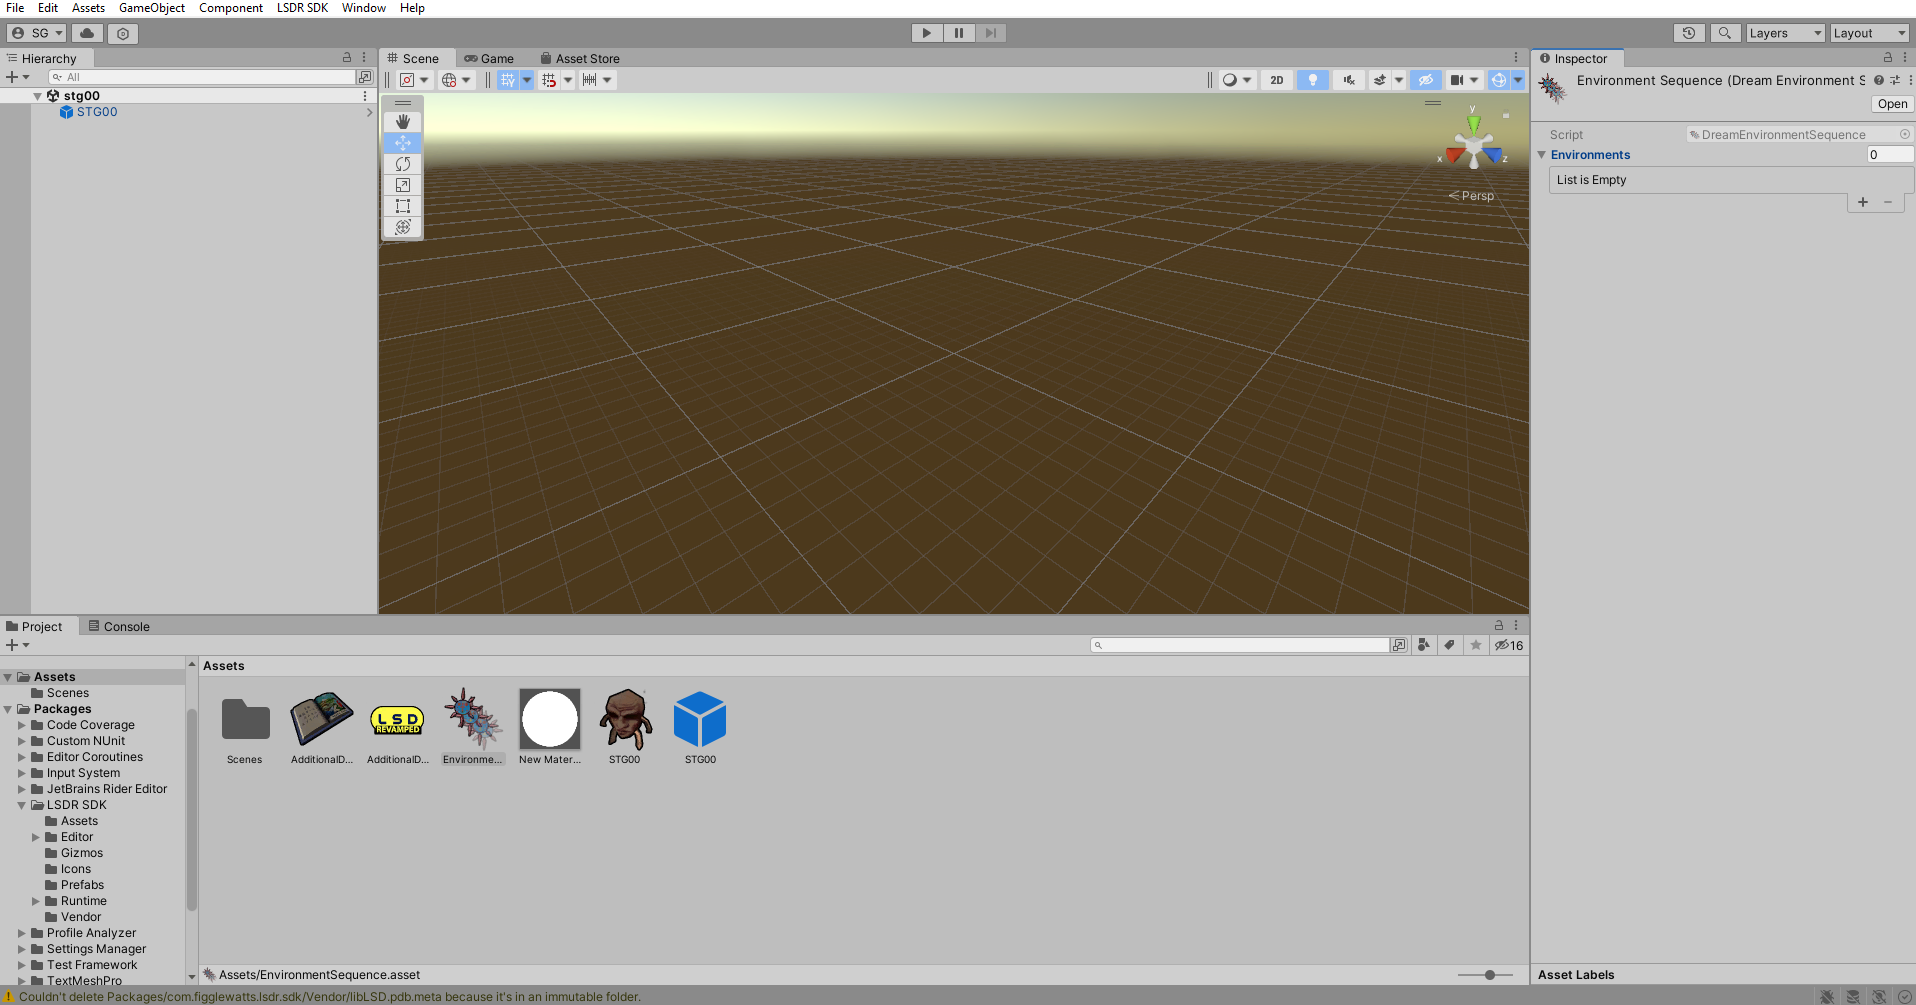
This will create the dream environment sequence.
Now, create a dream environment. You can do this from the Assets > Create > LSDR SDK > Dream environment sequence menu.
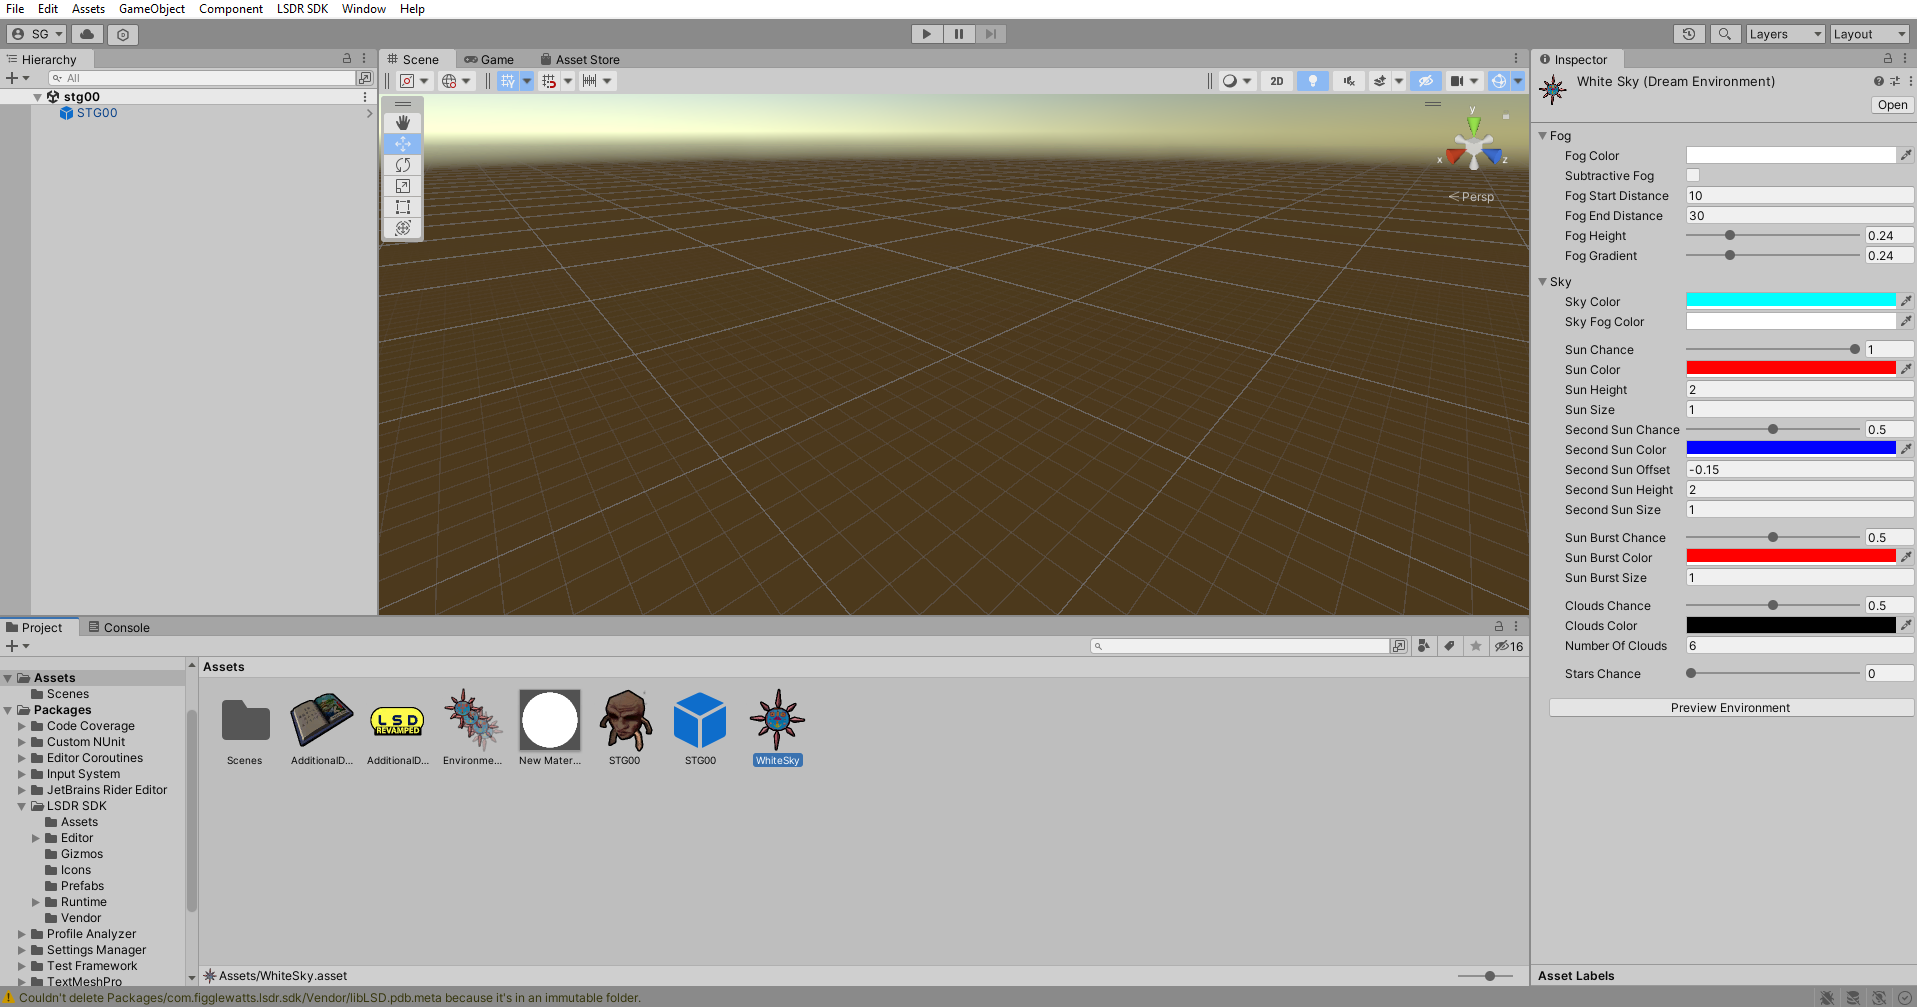
You should now have a created dream environment.
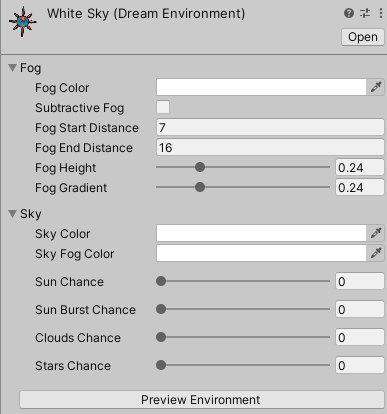
Let’s now set it up to be a white sky with white fog:
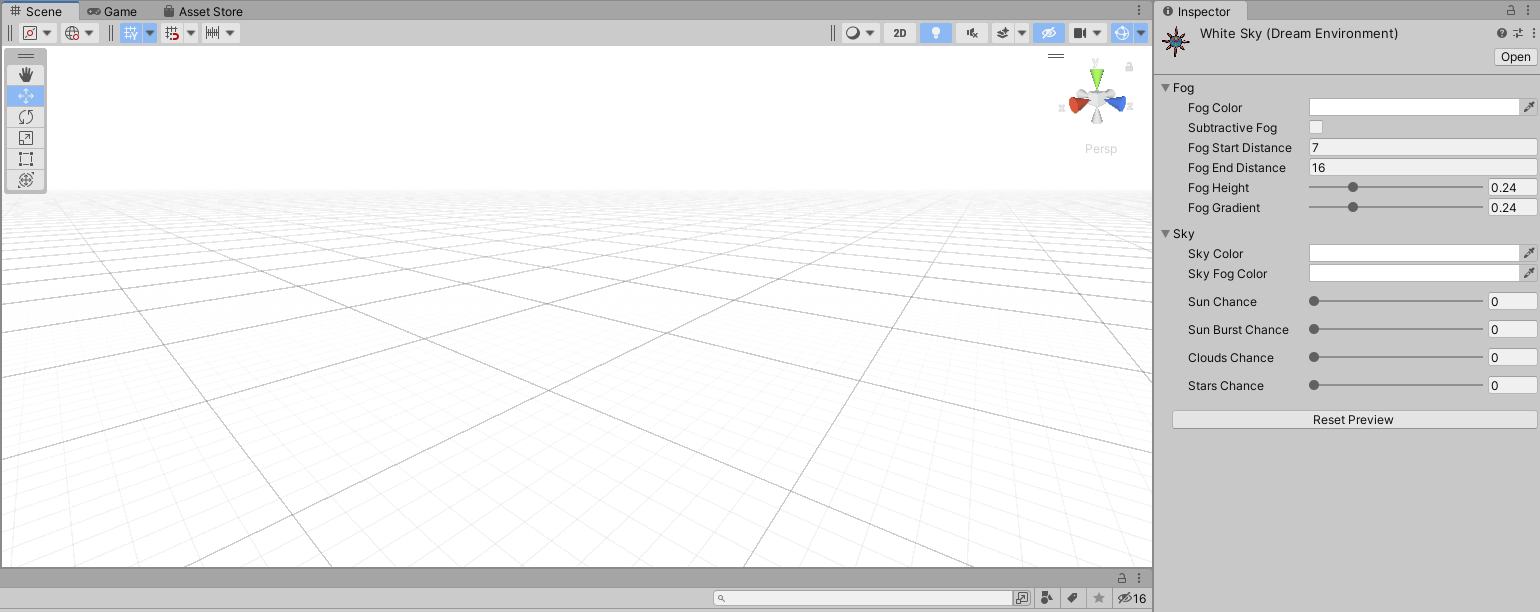
You can press the preview button to show how the environment will look in the Scene view. This won’t preview environment effects such as the sun, clouds, and stars - you’ll need to view these in-game.
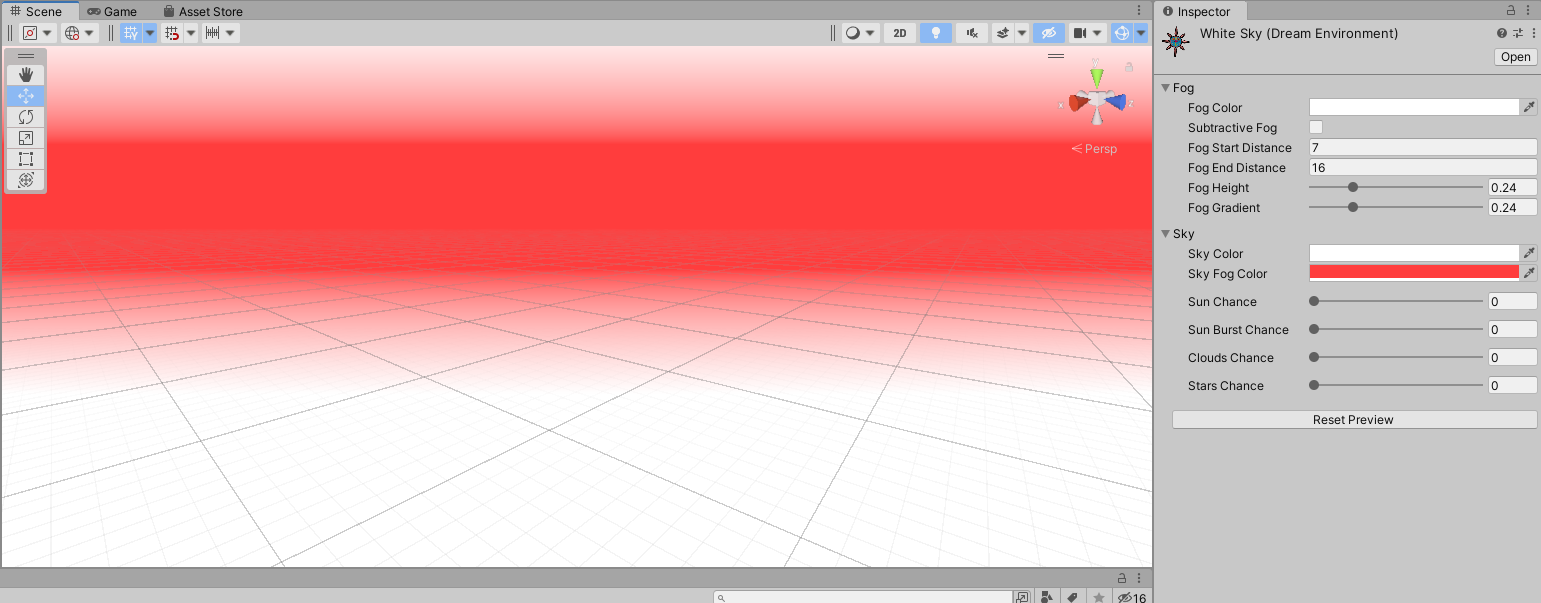
This doesn’t really show much. As an example, we can change the sky fog color to something more visible, then preview again:
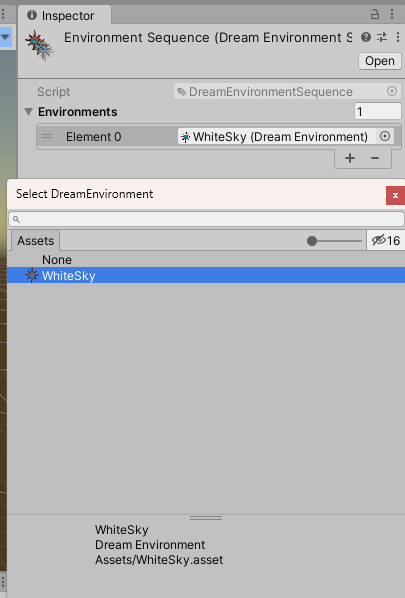
Now that we have our dream environment, we can add it to the dream environment sequence:
You can continue to create dream environments and add them to your dream environment sequence to add more variation in environments. Remember you can use the same dream environment sequence across multiple dreams using EnvironmentOffset.
Setting up the scene #
First, let’s create an object to store all of our Entities in. These will be any of the entities available to you in the SDK.
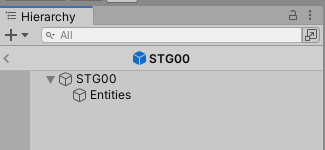
Press the plus button in the Hierarchy and add a an empty object called ‘Entities’ to the dream prefab.
All of your entities need to be added as children of this object.
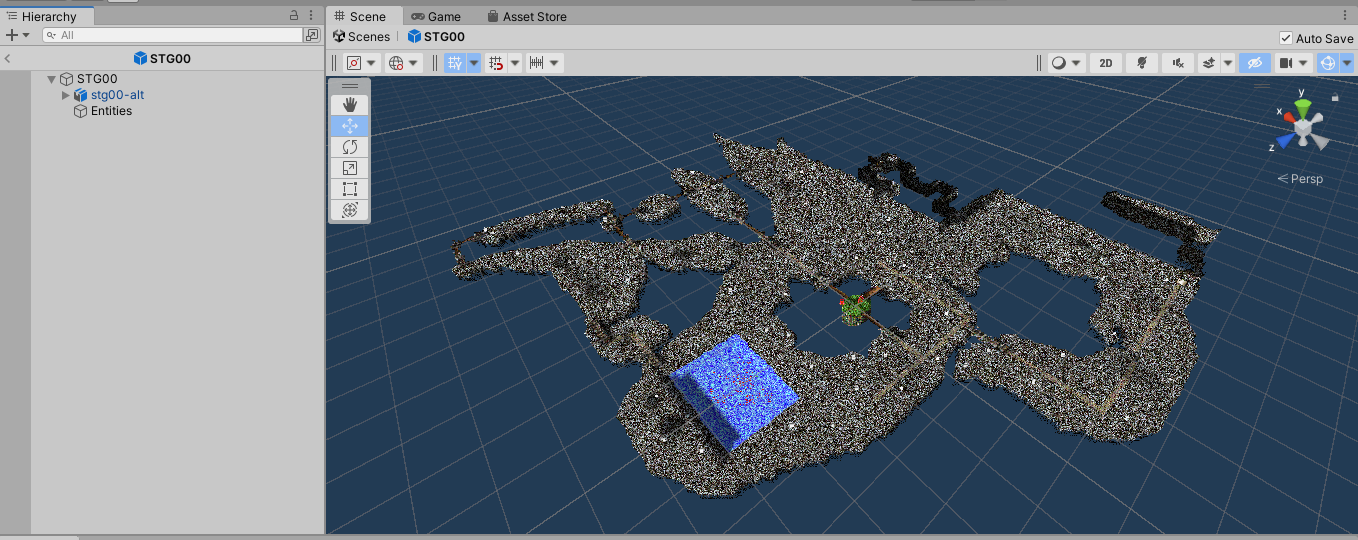
Let’s now add some level geometry from a 3D asset loaded into Unity, so the player has something to walk around. This is the part where you get creative! Simply add things as children of the dream prefab, and they will be loaded when the dream is loaded.
In my case, I’ve made levels in Blender, and exported them as FBX models. If you follow this approach try to tesellate your meshes into triangles/quads around a unit in size, as otherwise the PSX affine texture mapping in classic graphics can look very extreme/unpleasant.
You could also create levels in whichever way you like, possibly using Probuilder, or any other tools compatible with Unity. As long as it can import to Unity, and as long as it has collision, LSD:R should be able to support it. If something appears to not be working, let me know!
Spawning the player #
Let’s add some entities to let LSD:R know where the player should be spawning in the dream.
An entity in the SDK is a Unity GameObject in a dream prefab (as a child of the ‘Entities’ GameObject) with an entity script added as a component.
First day spawns #
Where the player spawns on the first dream on the first day can be preset.
The dream you start in on the first day is chosen randomly from dreams which have ‘First Day’ enabled. If only one has it enabled, that dream is chosen. If multiple have it enabled, a random dream out of them will be chosen. If none have it enabled, a random dream out of every dream in the dream journal will be chosen.
Within that dream, the player will spawn at a PlayerSpawn entity with ‘Day One Spawn’ enabled. If multiple PlayerSpawn entities have this enabled then a random one will be chosen from them.
Let’s set up our dream as the first day, and set up a place for the player to spawn into on the first day.
Start by enabling ‘First Day’ on the dream.
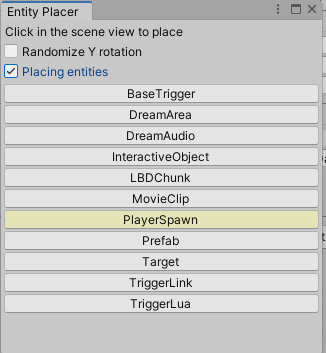
Then, open the entity placer tool by clicking the LSDR SDK > Entity Placer menu.
This should open a window for the tool. The entity placer lets you click in the Scene view to create an entity on the collider where you clicked.
To use the tool, simple enable ‘Placing entities’ to allow your clicks in the Scene view to create entities, and click one of the buttons for the entity you wish to create. in our case, click ‘PlayerSpawn’ as we’d like to create one of those. The currently selected entity will be highlighted in yellow.
Now, click somewhere in the Scene view, and your entity will be created. It will have an automatically generated GUID as its initial ID (and name), but you can change this to be whatever you’d like. Be sure to disable ‘Placing entities’ when you’re finished placing, so you don’t accidentally place too many!
Make sure you enable ‘Day One Spawn’ to let LSD:R know that the player should be spawned here on the first day.
This handles where you spawn on the first dream of the first day, but we also need to set up where you spawn the rest of the time.
Other spawns #
Other PlayerSpawn entities placed around the dream will be chosen from at random when the player links to this dream.
You can also make the player spawn at a specific PlayerSpawn, which will be shown next.
Triggering links #
We can use TriggerLink entities to control the player linking to another dream.
Another dream #
You will need another dream if we’re going to link to it. You can of course link to the same dream, but more dreams are interesting! Follow the steps you’ve already read to create another dream we can link to.
Making a tunnel #
Let’s now create a tunnel we can walk through to travel between dreams.
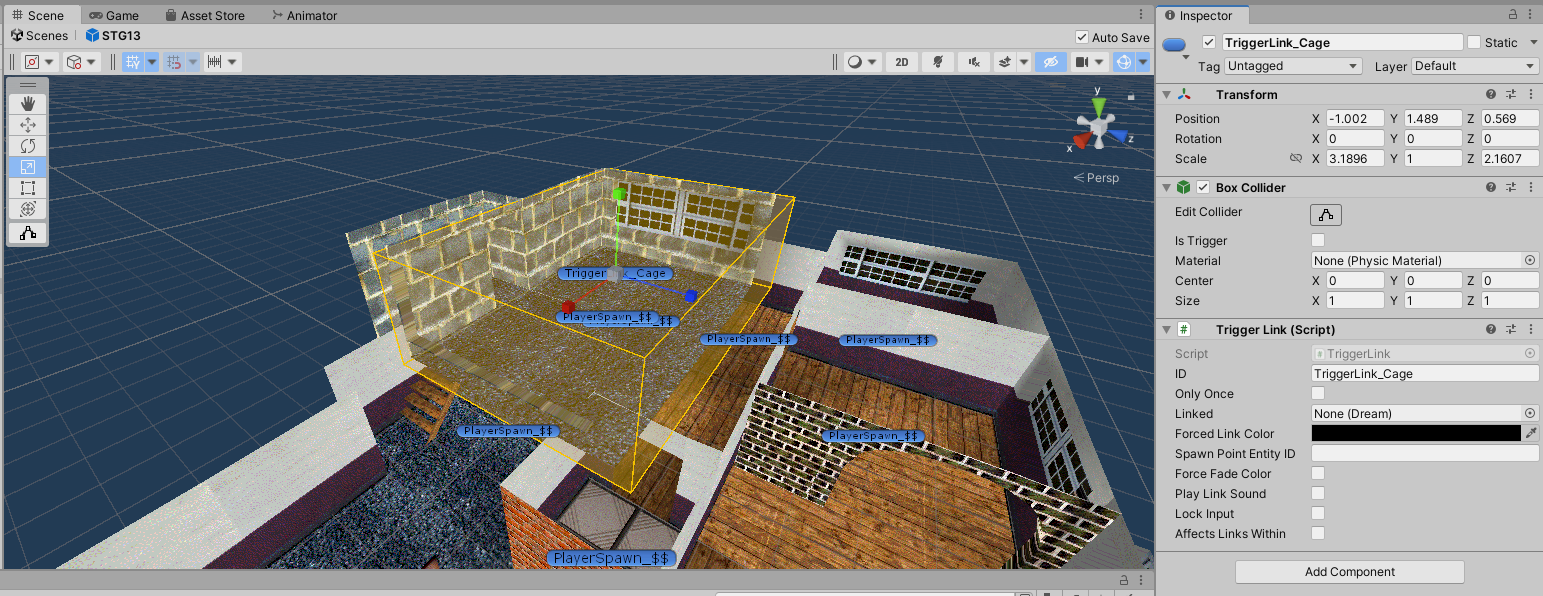
Place a TriggerLink using the entity placer tool where you’d like the tunnel link to be. Use the Unity scale tool to size it. When the player walks into this area, they will carry on walking while the screen fades out and the next dream is loaded.
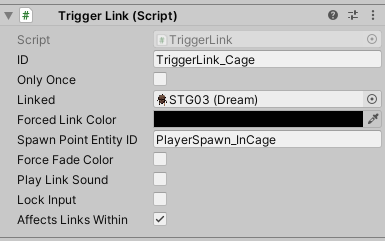
To set the TriggerLink up as a tunnel, you need to:
- Set ‘Linked’ to the dream this tunnel links to.
- Set the ‘Forced Link Color’ to black (make sure you set the alpha to non-transparent too).
- Set the ‘Spawn Point Entity ID’ to the entity ID of the PlayerSpawn in the linked dream that the player should spawn at. If not given, a random PlayerSpawn will be chosen instead.
- Enable ‘Force Fade Color’, as tunnels always fade to black.
- Enable ‘Lock Input’, so that the player continues running through the tunnel when we link.
Now we need to create the PlayerSpawn the player will spawn at when coming through the tunnel from the linked dream. Use the entity placer tool to put a PlayerSpawn in front of the tunnel, but not touching the TriggerLink.
Make sure you give it a descriptive ID, as we’ll be using it in the linked dream to set up the other end of the tunnel. Also ensure ‘Tunnel Entrance’ is checked - the PlayerSpawns used for tunnels aren’t used as part of random spawning (from links) unless there are no other PlayerSpawns available.
The PlayerSpawn’s local Z-axis is used to determine which direction the player will spawn. Ensure that the PlayerSpawn entity is rotated such that the local Z-axis (blue) points away from the tunnel.
Now we can set up the other side of the tunnel in the linked dream.
Edit the prefab for that dream so we can add a tunnel there referencing this dream with the entities you’ve just created. Repeat the steps, but be sure to reference the correct PlayerSpawn ID in the TriggerLink, and ensure the PlayerSpawn ID for the tunnel exit matches that of the TriggerLink ‘Spawn Point Entity ID’ we created earlier.
If everything has been set up correctly, you should now have a tunnel linking 2 dreams together!
Fixed link area #
We can also use a TriggerLink to set up an area that, when the player is within, should always link to a certain area when linking randomly (like walking into a wall).
Place a TriggerLink where you want the area to be. Use the Unity scale tool to size it.
To set the TriggerLink up as a fixed link area, you need to:
- Set ‘Linked’ to the dream you want to force the link to.
- Enable ‘Affects Links Within’
Now, whenever the player triggers a random link while inside this area, they will link to the given dream.
Playing audio #
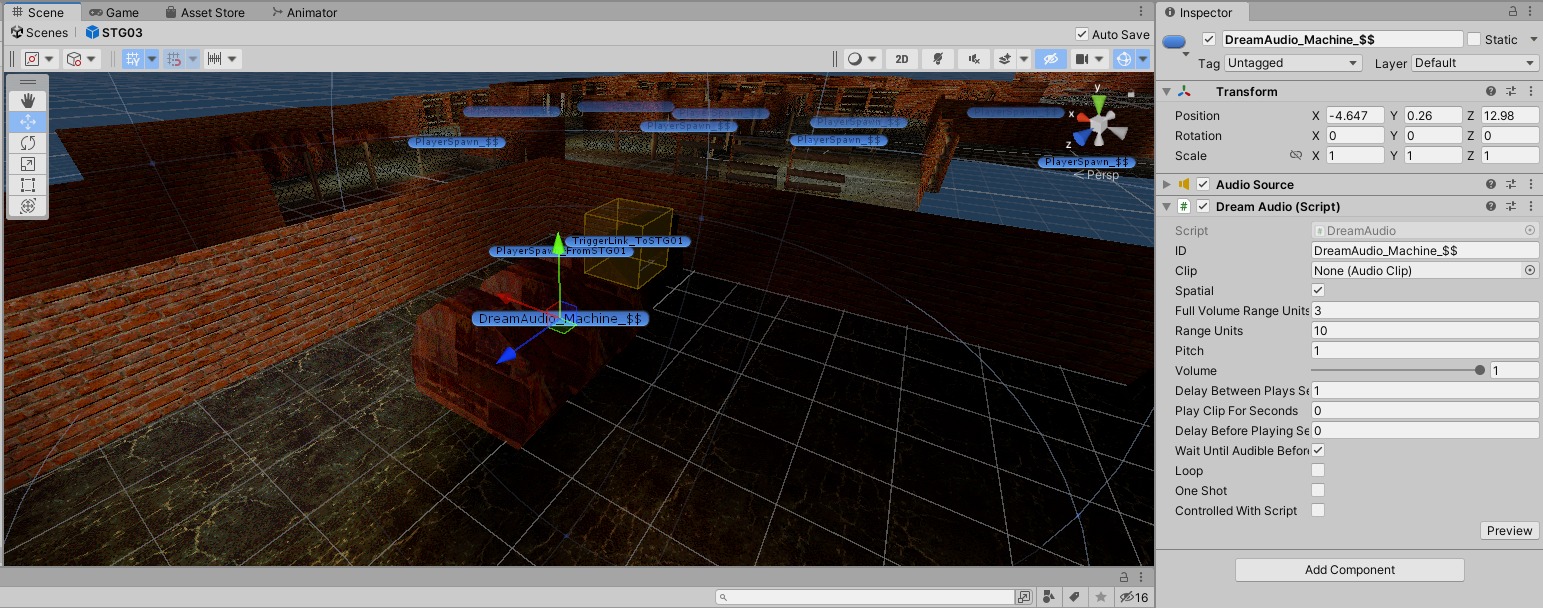
We can use a DreamAudio entity to play audio in a dream. This audio can be looped continuously, or played once, or played in a repeating pattern.
Let’s play some audio. Place a DreamAudio entity where you want the audio to play from.
Now, let’s configure it:
- ‘Clip’ is the Unity audio clip we’re gonna play.
- Let’s enable ‘Spatial’ to make the sound play in 3D space.
- And enable ‘Loop’ to make the sound loop indefinitely.
That’s pretty much it - we’ve made a looping sound in 3D space.
In general, there are a number of ways we can play a sound:
- Looping: If we have ‘Loop’ enabled, the sound will loop based on the length of the clip. Use this to play a looped audio clip.
- One Shot: If we have ‘One Shot’ enabled, the sound will only play once.
- Repeating: If Neither ‘Loop’ not ‘One Shot’ are enabled, the sound will first wait for ‘Delay Before Playing Seconds’, then play for ‘Play Clip For Seconds’ then wait for ‘Delay Between Plays Seconds’, then play again, and so on…
If ‘Controlled With Script’ is ticked, the sound can only be controlled from the lua API in a Lua script.
Interactive objects #
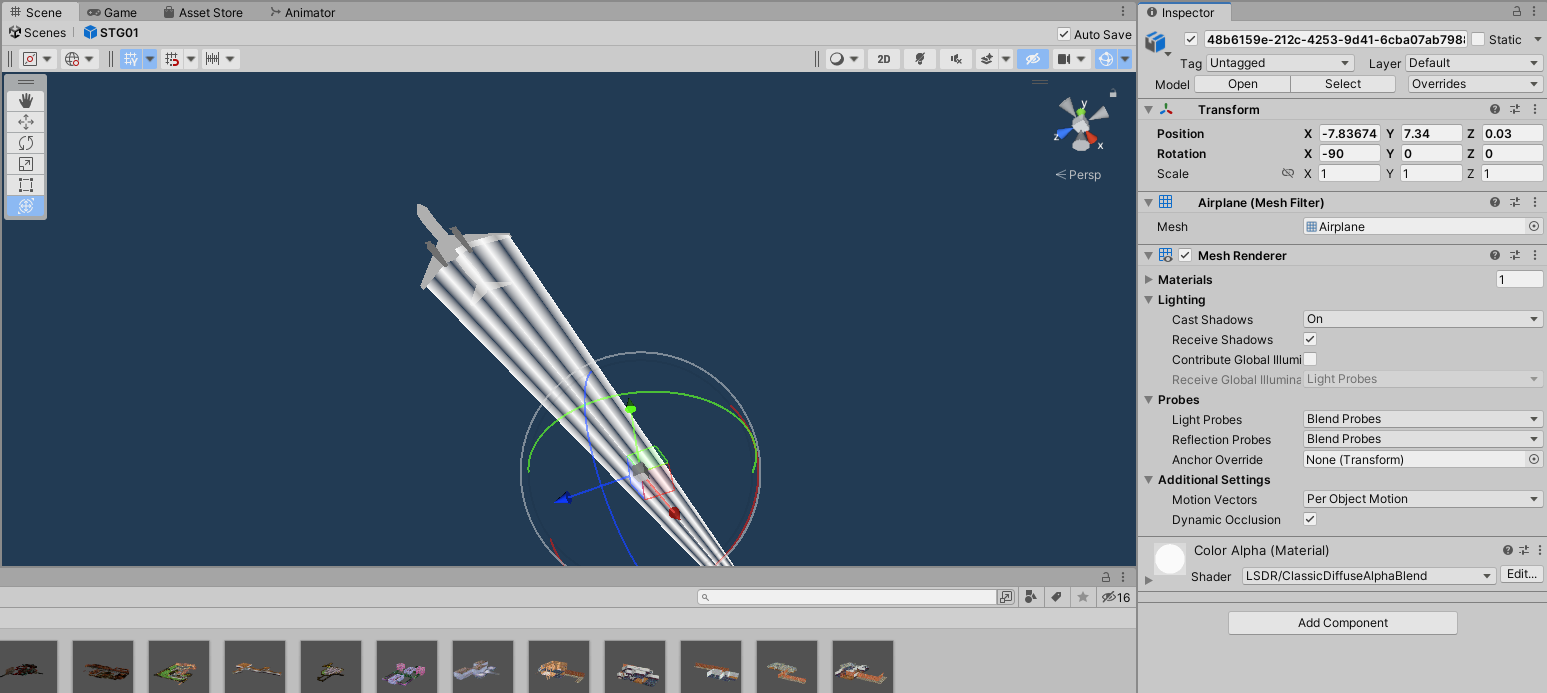
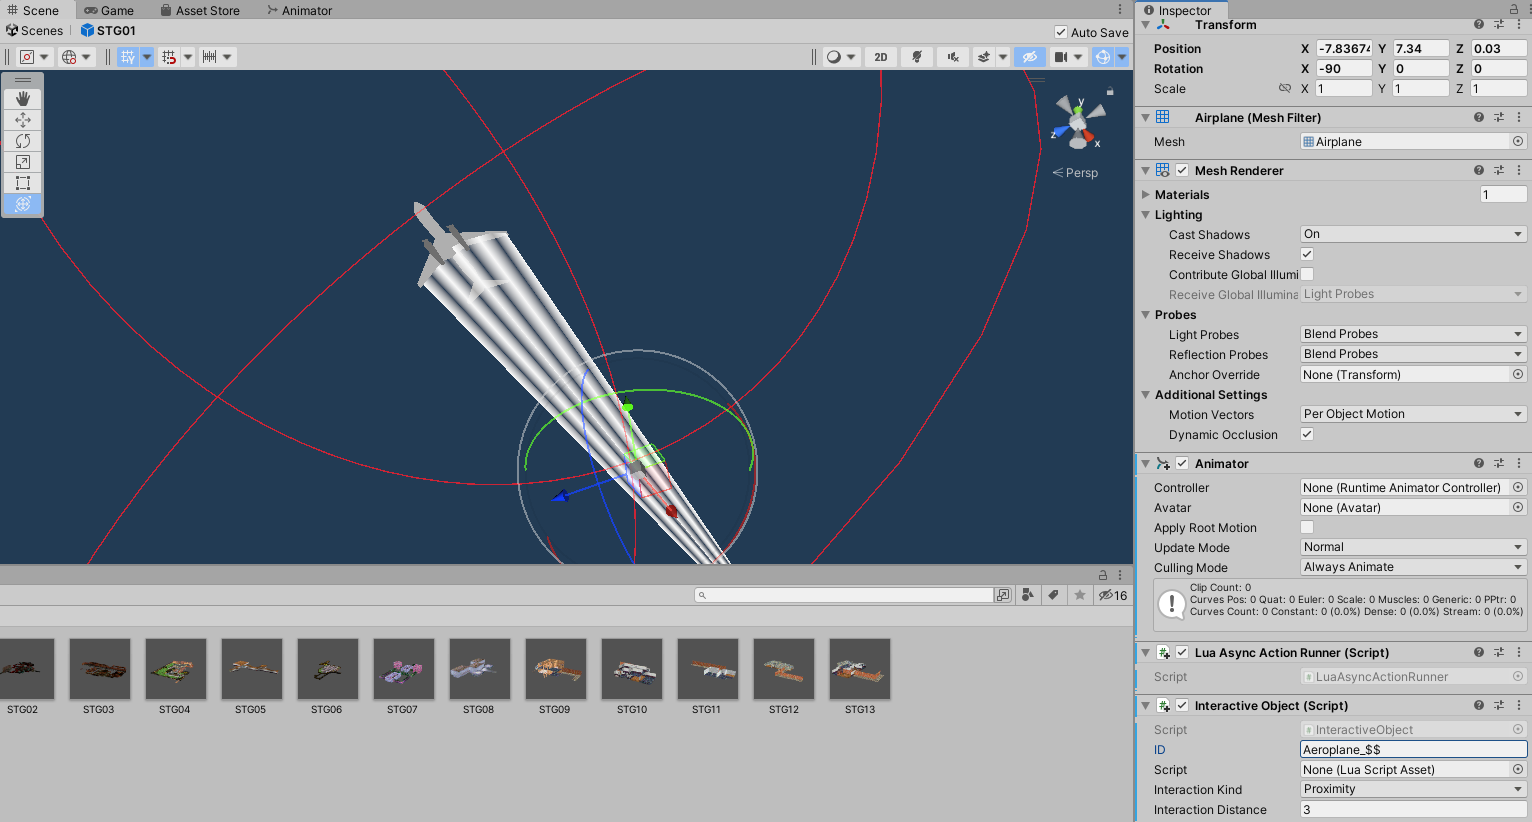
Now, let’s add an InteractiveObject to our dream. We’ll make a simple one that just moves forwards slowly, and stays hidden until we get within a certain distance.
First, add a GameObject for the object. This can be any Unity GameObject, with most components supported (notably, custom MonoBehaviours are not supported). In our case we’re using an object with a mesh renderer.
Now, add an InteractiveObject component to the GameObject to make it become an InteractiveObject entity.
We can now create a Lua file to script this object’s behaviour. This will be an InteractiveObject Lua script.
Put the following code in the Lua script:
interacted = false

function start()
    -- called when this entity is created

    if Random.OneIn(2) then
        -- one in 2 chance to not appear
        this.GameObject.SetActive(false)
        return
    end

    if IsDayEven() then
        -- only appear on odd days
        this.GameObject.SetActive(false)
        return
    end

    -- stay inactive initially
    this.SetRenderersActive(false)
end

function update()
    -- called every frame while this entity is active

    -- if we haven't interacted yet, no need to update
    if not interacted then return end

    -- move forwards slowly
    this.MoveInDirection(this.Forward, 0.05)
end

function intervalUpdate()
    -- called on a configurable interval while this object is active
end

function interact()
    -- called depending on the interaction type of the object
    interacted = true  -- we have now interacted

    -- set ourselves visible
    this.SetRenderersActive(true)

    -- log a graph contribution
    this.LogGraphContribution(5, 5)
end
Now assign the script you created to the ‘Script’ of the InteractiveObject.
This does the following:
- The object will stay hidden until the player comes within the ‘Interaction Distance’ (if ‘Interaction Kind’ is Proximity).
- When interacted with, it will appear and log a contribution to the dream graph.
- Once interacted with, it will move forwards at a slow speed.
- It has a 1 in 2 chance of not appearing, and it will also only appear on odd days.
Switching graphics modes #
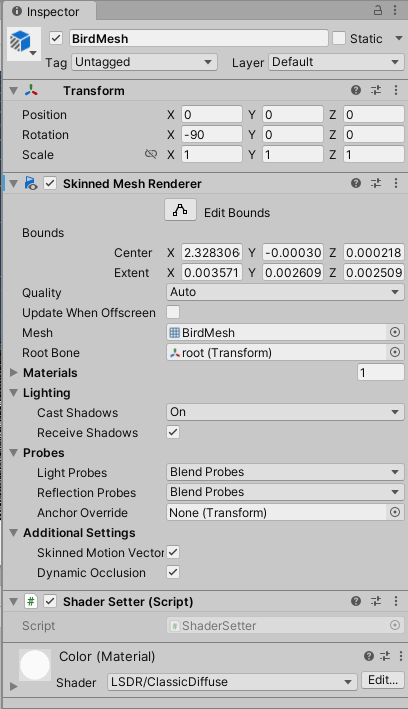
For any object that has a Renderer component on it using materials with the LSDR shaders, you’ll need to add a ShaderSetter component to give the game the ability to dynamically toggle the shader between classic and revamped.
You can add a ShaderSetter to a GameObject with the ‘Add component’ button, searching for ShaderSetter.
Graph spawn maps #
Which Dream you start on each day is controlled by a GraphSpawnMap (excluding the first day, which is controlled with a boolean on the Dream asset).
A GraphSpawnMap maps squares on the dream graph to Dreams for the player to start on. Whichever graph square you land on at the end of the previous day will control which Dream you start on when you start a day.
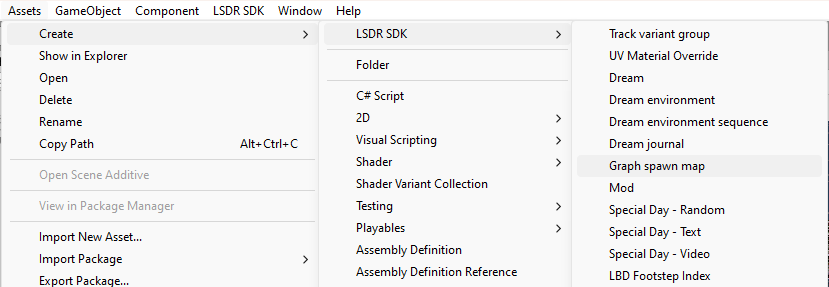
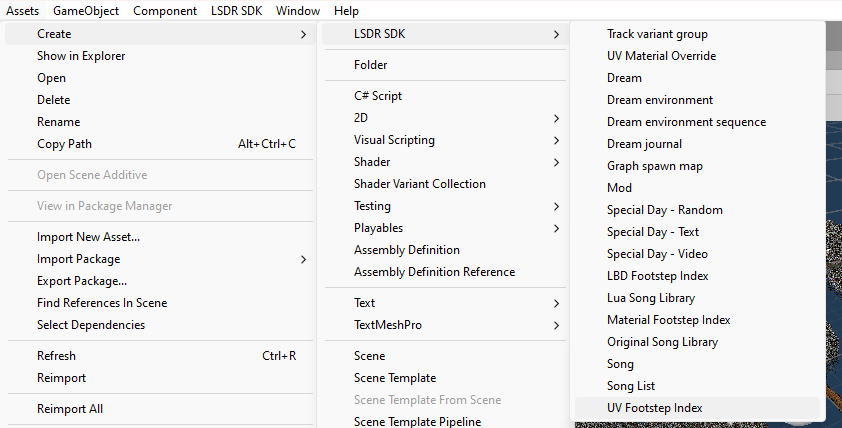
Let’s start by creating one with Assets > Create > LSDR SDK > Graph spawn map.
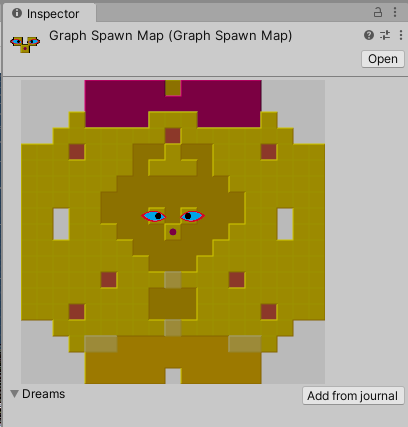
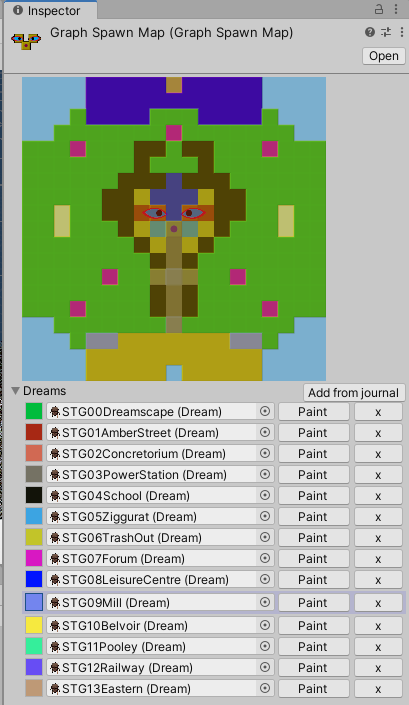
Once created, you should see an image of the dream graph in the inspector.
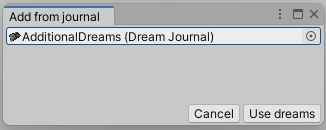
We need to add some Dreams to the GraphSpawnMap, so we can paint them onto the graph. Press the ‘Add from journal’ button to add all the dreams from a DreamJournal.
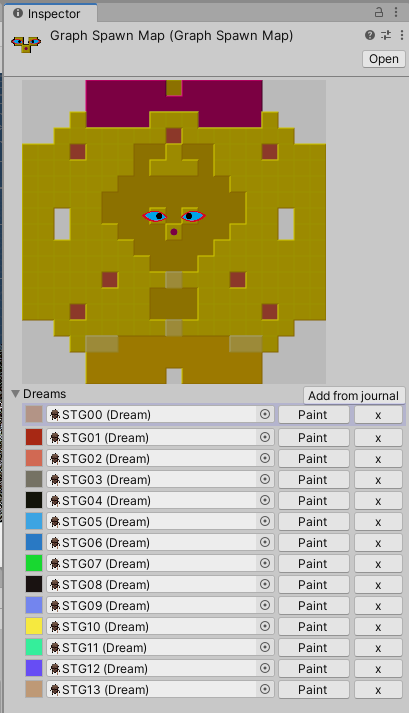
Select the DreamJournal you’ve created, and press ‘Use dreams’. You should now see the inspector window for the GraphSpawnMap populated with Dreams.
You can now click on the ‘Paint’ button next to Dreams to enable painting. Click and drag on the dream graph with left mouse button to paint squares as this dream (it should show as the colour). Use right mouse button to erase. The colour can be changed by clicking on the colour next to the Dream.
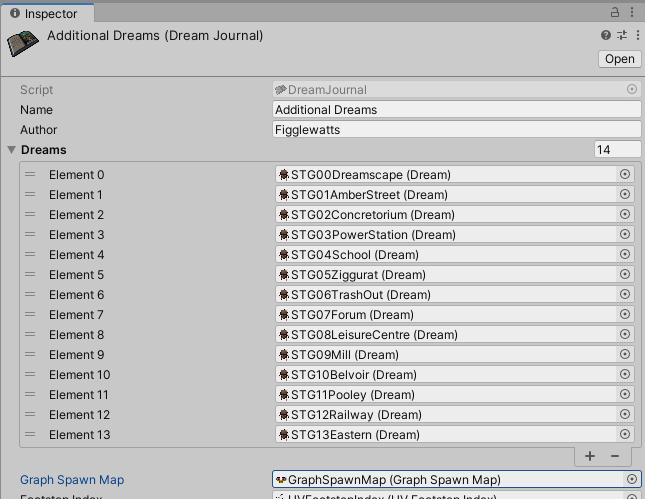
Once your GraphSpawnMap is done, make sure you set your DreamJournal to use it:
Special days (text/video days) #
Special days are pieces of text, or videos that play, instead of regular gameplay.
The following assets can be used to configure special days, on a DreamJournal:
- TextSpecialDay: Used to specify a special day that is a passage of text.
- VideoSpecialDay: Used to specify a special day that is a Unity VideoClip to play.
- RandomSpecialDay: Used to select a special day randomly from a list of other special day assets.
You can create these assets with Assets > Create > LSDR SDK > ....
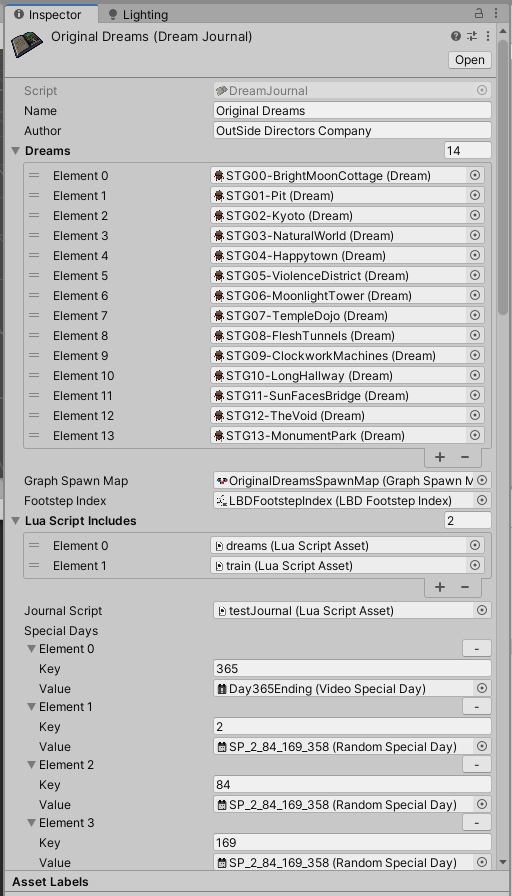
To configure special days for your DreamJournal, simply add them to the ‘Special Days’ section:
You can use the ‘Add Element’ button in the DreamJournal inspector to add special days to the journal.
The Key of each Element is the day on which it should occur (from 1 to 365), and the Value is the special day asset to use as the special day.
Footstep sounds #
You can add a footstep index asset to a DreamJournal to tell the game which footstep sounds to play in certain situations.
In this example we’ll be using a UVFootstepIndex, but there are other footstep indexes available for use (such as MaterialFootstepIndex). We’re using a UVFootstepIndex because the assets in the example project use a texture atlas, so we can define the atlas via UV coordinates to map footstep sounds. Other setups might want to map Unity Materials to footstep sounds via a MaterialFootstepIndex.
Create a UVFootstepIndex with Assets > Create > LSDR SDK > UV Footstep Index.
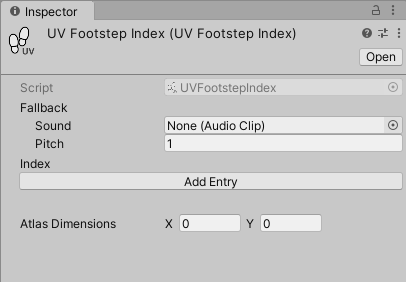
You should now see the UVFootstepIndex editor in the inspector.
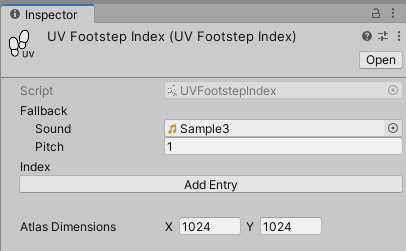
Set the sound you want to use as a fallback, for if no matching UV coordinates are found for a surface we’re walking on. This will essentially be the default footstep.
Now, make sure you set the Atlas Dimensions to the size of the texture atlas you’re using.
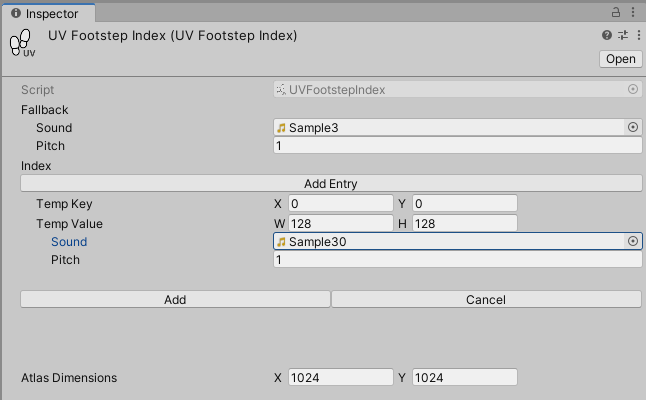
Now, click the ‘Add Entry’ button to add a footstep sound for a subsection of our texture atlas.
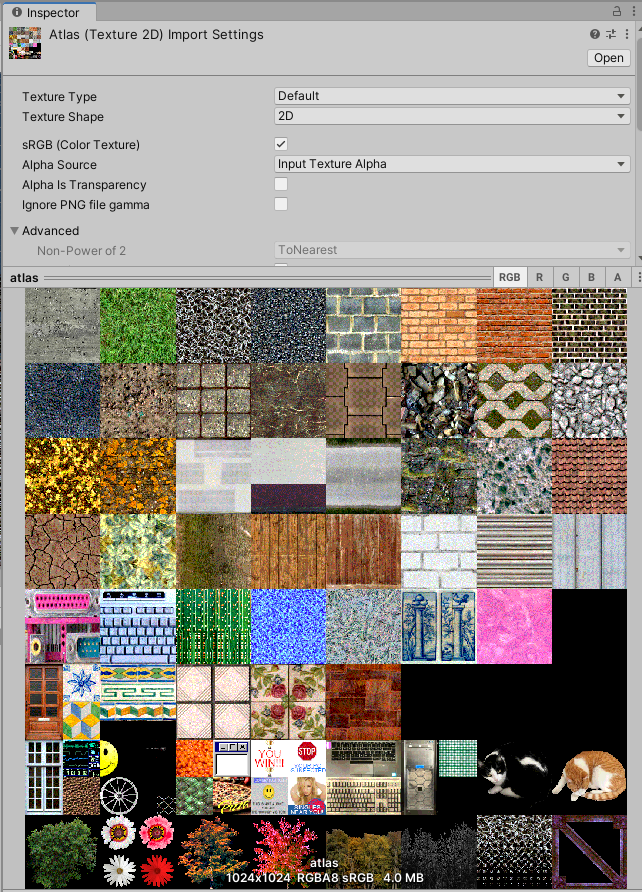
Let’s say we want to choose a footstep sound for the top left texture in the atlas:
We know the atlas is 1024x1024px, we know the texture is 128x128px, and we know it’s at (0, 0) px within the atlas, so we can fill out the details for this texture in the index:
The Key is the rectangle that defines where the texture is within the atlas (in pixels). The Value is the footstep sound to play (along with the pitch at which to play it).
Press the ‘Add’ button to add it to the index.
Once your index is complete, you can set it on your DreamJournal:
Song libraries #
Each Dream can have a ‘song library’ asset specified. This asset controls which Songs will be played when the player is in the dream.
The song library specified on the Dream will only be used if the ‘Use Original soundtrack’ setting in-game is disabled.
There are currently two options for song libraries:
- LuaSongLibrary: for playing Songs from a SongList via a Lua script.
- OriginalSongLibrary: Used to play from multiple different SongLists based on the current soundfont, like how it worked in the original LSD.
For most use cases, LuaSongLibrary will be absolutely fine.
To set up a LuaSongLibrary, first create a Lua script (in the song library format):
function getSong(style, songNumber)
    if Random.OneIn(8) then
        return nil
    end

    local songIdx = Random.IntMax(#songList.Songs)
    return songList.Songs[songIdx+1]
end
This script has a 1 in 8 chance of not playing a Song, otherwise it will select a Song at random from the SongList.
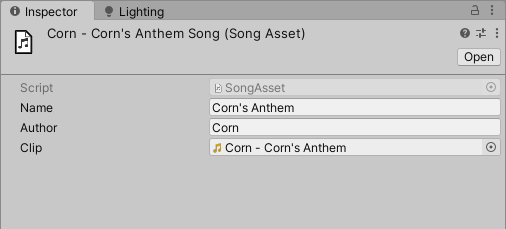
Next, create some Songs for your audio files using Assets > Create > LSDR SDK > Song:
Fill in the Name and Author fields for them to show in-game (in the pause menu), and set the Clip to the Unity AudioClip of your Song.
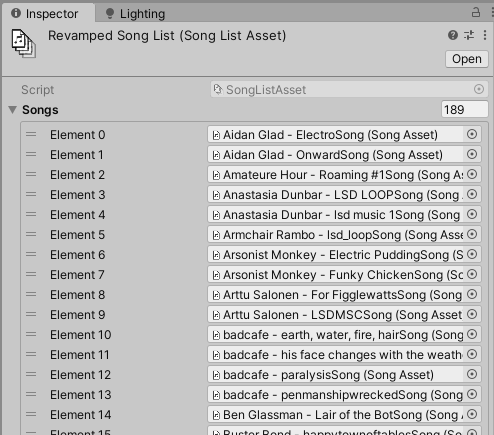
Now, we can create a SongList to group together some Songs we want to play - create one with Assets > Create > LSDR SDK > Song List:
Now, populate the Songs list with the Songs you want to group together.
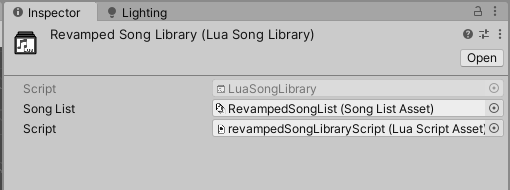
Finally, let’s create a LuaSongLibrary with Assets > Create > LSDR SDK > Lua Song Library:
Give it the SongList you created, and the Lua script from earlier, and it’s all set. Now make sure you set it in the Dreams you want to use this song library!
Lua scripting #
There are a number of places in your mod you can customise functionality with Lua scripts. This section of the tutorial covers a handful of common use-cases for Lua scripting, but do read through the Lua API documentation for a complete breakdown of Lua functionality.
Interactive objects #
InteractiveObject entities can be scripted with an InteractiveObject-type Lua script. In it you can use the InteractiveObject API along with any other APIs to implement your object’s behaviour.
Here is an example of a script for an InteractiveObject. This implements an object that acts in the following way:
- Is initially hidden, then appears as the player interacts with it.
- Influences the dream graph and starts playing an animation when interacted with.
- Additionally when interacted with, starts an action to wait a short while, play a sound (via DreamAudio), then loop.
- Starts at a randomized Y-rotation.
- Links the player to a different dream when they get close enough.
- Has a 1 in 2 chance of not appearing, and only appears on even-numbered days.
require "dreams"

player = GetEntity("__player")
audio = this.GameObject.GetChildByName("Audio").DreamAudio

distanceToPlayer = 0
linked = false

function start()
    -- called when this entity is created

    if Random.OneIn(2) then
        -- one in 2 chance to appear
        this.GameObject.SetActive(false)
        return
    end

    if not IsDayEven() then
        -- only appear on even days
        this.GameObject.SetActive(false)
        return
    end

    -- randomize rotation
    this.GameObject.LocalRotation = Unity.Vector3(0, Random.FloatMinMax(0, 360), 0)

    -- hide initially
    this.SetRenderersActive(false)
end

function update()
    -- called every frame while this entity is active
    if linked then return end -- if we've linked from this entity don't update

    -- link to another dream when player is close
    if distanceToPlayer < 0.3 and not linked then
        linked = true
        DreamSystem.SetNextTransitionDream(dreams.School)
        DreamSystem.TransitionToDream()
    end
end

function intervalUpdate()
    -- update distance on an interval as length() can be costly
    distanceToPlayer = (player.WorldPosition - this.GameObject.WorldPosition).length()
end

function interact()
    -- called depending on the interaction type of the object
    this.LogGraphContribution(2, 3)

    -- show object, start animating
    this.SetRenderersActive(true)
    this.PlayAnimation(0)

    -- wait a short while, play the sound, then loop
    this.Action.WaitUntil(Condition.WaitForSeconds(0.833))
               .Then(|| audio.Play())
               .ThenLoop()
end
Triggers #
TriggerLua entities are able to run a TriggerLua-type Lua script when the player enters a trigger collider.
Here is an example of one of these scripts - it will link the player to a randomly chosen dream (in the form of a tunnel link) from a set of dreams defined in the script:
interiorDreams = {
    GetDreamByName("Mill"),
    GetDreamByName("Belvoir"),
    GetDreamByName("Pooley"),
    GetDreamByName("Railway"),
    GetDreamByName("Eastern")
}

function linkToInteriorEntrance()
    -- choose a random interior dream to link to
    local interior = interiorDreams[Random.IntMinMax(1, #interiorDreams + 1)]

    -- set up the link like a tunnel entrance
    DreamSystem.SetNextTransitionDream(interior)
    DreamSystem.SetNextTransitionColor(Colors.Black)
    DreamSystem.SetTransitionSounds(false)
    DreamSystem.SetNextTransitionLockControls(true)
    DreamSystem.SetNextTransitionSpawnID("InteriorEntrance")
    DreamSystem.TransitionToDream() -- perform the link
end

function start()
    -- called when this entity is created
end

function update()
    -- called every frame while this entity is active
end

function onTrigger()
    -- called when the player enters the trigger
    linkToInteriorEntrance()
end

function onTriggerExit()
    -- called when the player exits the trigger
end
Including other Lua files #
It can sometimes be useful to write shared Lua scripts, that other scripts are able to require and access objects from.
Your DreamJournal has a list of Lua scripts to make available for other Lua scripts to use in ‘Lua Script Includes’:
Here, we have added dreams.lua, which is a Lua script that defines and exports a list of Dreams for easier access in other Lua scripts:
dreams = {
    Dreamscape = GetDreamByName("Dreamscape"),
    AmberStreet = GetDreamByName("Amber Street"),
    Concretorium = GetDreamByName("Concretorium"),
    PowerStation = GetDreamByName("Power Station"),
    School = GetDreamByName("School"),
    Ziggurat = GetDreamByName("Ziggurat"),
    TrashOut = GetDreamByName("Trash Out"),
    Forum = GetDreamByName("Forum"),
    LeisureCentre = GetDreamByName("Leisure Centre"),
    Mill = GetDreamByName("Mill"),
    Belvoir = GetDreamByName("Belvoir"),
    Pooley = GetDreamByName("Pooley"),
    Railway = GetDreamByName("Railway"),
    Eastern = GetDreamByName("Eastern")
}
Now, in another Lua script, we can do the following to access these Dreams:
require "dreams"
-- now we can access, for example, dreams.Dreamscape
The name you need to use in the require statement is the same as the filename of the Lua script. Each Lua script added to the Lua Script Includes should have a unique filename.
Something important to note is that these scripts will be executed when they are imported, so there is no shared state between different Lua scripts. Each script using a shared script will essentially have its own copy of the script.
If you need shared state, you should explore the persistence API.
Building your mod #
Building your mod is easy! Simply go to the LSDRevampedMod asset for your mod, and click the big ‘Build’ button:
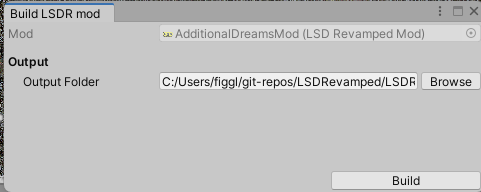
This should open a window for you to browse for the folder you want your built mod to be in, find somewhere using the ‘Browse’ button:
Then when you’re ready hit the ‘Build’ button and your mod will build. When it’s done there will be a popup and the output folder should open! You should see folders for each platform (windows, mac, linux):
Within these folders should be an ’lsdrmod’ file, named based on the name of your mod:
This file is what the game loads for your mod. It exists for every platform so that your mod works on every platform!
Installing your mod #
To install your mod, put it in the following folder in your LSD: Revamped install location: LSDR_Data/StreamingAssets/mods/, then launch the game. You should be able to switch to your mod and journal now!
Note if you are on Mac, then the mods folder will be within the application - Ctrl + Right Click on the application, and click ‘Show package contents’, then you’ll be able to find StreamingAssets/mods/.
Testing your mod #
To test your mod, open LSD: Revamped, and make sure you select your mod and journal from the settings menu.
You can now use the developer console (press tilde, or ‘`’, next to the 1 key) to load into specific dreams, for example the command DreamSystem.LoadDream Dreamscape run from the title screen will load you into a dream in the current journal called ‘Dreamscape’. Some functions in-game (such as graph logging etc) won’t work when loading into dreams like this, for that to work you need to start the game normally.
There are a number of different console commands that could be used to make testing easier, make sure to refer to the documentation to learn more!
Distributing your mod #
Distributing your mod is easy, simply add all of the platform folders (windows, mac, linux) to an archive such as zip or 7z, and upload this somewhere for people to download, preferably with a README stating what the mod is and how to install it etc.
